Professional Bespoke Enclosures Manufacturer Since 2007 - Hongfa Shunda
Language

Learn how to build custom aluminum enclosures for electronic projects. Complete guide covering material selection, cutting, bending, and assembly.
Off-the-shelf enclosures are always a bit of a compromise - they rarely fit your custom circuit board perfectly, and you end up drilling extra holes, making awkward cutouts, or settling for a box that's almost right. It's usually the case that pre-made solutions force your design to adapt rather than protecting it the way it should be.
But building your own aluminium enclosure box lets you do things on your own terms. You get the exact dimensions you need, precise mounting points, and custom openings for connectors, displays, or ventilation. And the best part is you've got complete control over the material thickness, finish and internal layout.
We're going to walk you through the complete fabrication process for creating custom aluminum enclosures from scratch. What techniques do pros use to cut, bend, and assemble enclosures that look factory-made? You'll learn them.
Each step includes specific measurements, tool recommendations, and techniques that work for hobbyists and small production runs. Let's get started with material selection.
The type of aluminium alloy you go with will determine how your enclosure performs when it gets stressed, hot, or exposed to the elements. Most custom aluminum enclosure projects use either 3003 or 5052 alloy sheets.
● 3003 aluminium works pretty well for indoor electronics that don't have to withstand harsh conditions. It's easy to cut, bend, and shape without cracking. You can use basic tools and still get good, clean results. Plus, it's a relatively cost-effective option that's perfect for light-duty applications.
● 5052 aluminium gives you superior strength and corrosion resistance, making it ideal for outdoor or industrial projects. It bends well without losing any structural integrity and resists salt water, chemicals, and extreme temperatures. Pick this alloy if you need to build something that's going to face some pretty tough conditions.
Sheet Thickness | Best Applications | Working Properties |
0.032" (0.8mm) | Small handheld devices, light covers | Cuts easily, bends by hand, very lightweight |
0.040" (1.0mm) | Standard electronics, prototypes | Good balance of workability and strength |
0.063" (1.6mm) | Medium equipment, wall-mount units | Requires brake for bending, stays rigid |
0.090" (2.3mm) | Heavy-duty industrial, outdoor gear | Needs power tools, maximum protection |
The thinner the sheet, the lighter it'll be, but the less rigid it'll be. Thicker material is better at protecting your components, but it can be a lot harder to work with. Match your thickness to the enclosure size and the way you plan on mounting it.
For most hobbyist projects, 0.040" thick 3003 aluminium is a sweet spot - it's got enough strength for secure mounting without needing to get out the big guns to shape the panels.
Accurate measurements are crucial - you don't want to make any costly mistakes or waste a lot of material. Start by sketching out your enclosure layout with all the component positions, mounting holes and panel dimensions clearly marked.
Add a bit of clearance (about 0.5 to 1mm ) around your circuit boards and internal components. Electronics get hot and tight fits can cause warping or damage when you're assembling your enclosure. Build that extra space in from the start.
Clean your aluminium sheet with some isopropyl alcohol before you start marking it. You don't want any oil, dust or oxidation getting in the way of your scribe lines - that just makes them harder to see and reduces measurement accuracy. Use a steel ruler and a sharp scribe to mark your cut lines. Pencils and markers tend to rub off when you're handling the panels, so it's better to use a scribe that creates permanent grooves that stay visible all the way through the fabrication process.
Mark the waste side of each cut line with an X so you always know which side to cut on - that way, you'll avoid dimension errors that can ruin your panels.
Check two adjacent sides for squareness with a machinist's square to create a reference edge. All your measurements should start from these verified edges - that way, you can prevent any cumulative errors from building up as you work your way through your layout.
For more complex enclosures with multiple bends, mark the bend lines on both sides of the sheet. You'll need to have some guides when you're positioning the material in the brake or forming tool.
Key measurements to double-check:
● Internal dimensions for your components to fit properly
● External dimensions for mounting requirements
● Bend line positions relative to panel edges
● Hole locations from two reference edges
● Panel overlap areas for joining methods
Transfer your measurements to the aluminium using center punch marks at corners and intersection points. These dimples will help guide your drill bit and keep you from wandering off during cutting operations.
There are a few different cutting methods you can use, and each one will give you a slightly different edge quality and different skill requirements. The choice is usually going to depend on the tools you have available, the level of precision you need, and the production volume you're working at.
● Tin snips are pretty good for straight cuts and gentle curves in material up to about 0.063" thick. Aviation snips are also a good option - they're color-coded for left, right, or straight cuts, so you can pick the right tool for the job. Start your cut a bit inside the scribe line and then file the edge back to the mark for precision.
● Hacksaws will work for any thickness, but they're going to leave you with rough edges that need filing. Use a 32-tooth-per-inch blade and support both sides of the cut to prevent the saw from binding. Apply some cutting oil to reduce friction and extend the life of your blade.
● Nibblers produce smooth edges without distorting the material. They cut out small pieces quickly and easily, working along curved or straight paths without any problem. The tool produces minimal burrs and works well near bend lines without affecting the metal's formability.
● Circular saws with carbide-tipped blades are great for cutting straight lines quickly in any thickness. Clamp a straight edge to act as a fence guide and feed the saw slowly to prevent the metal from melting. Don't forget to wear some safety glasses for flying chips.
● Shears (electric or pneumatic) are a breeze to use - they can slice through sheet metal like it's paper. If you're doing a production run where you need identical panels, they're a perfect tool for the job. And let's be honest - the cut quality is just as good as what the professionals do at fabrication shops.
Tool Type | Max Thickness | Edge Quality | Curve Capability |
Tin Snips | 0.063" | Fair | Good |
Nibbler | 0.090" | Excellent | Excellent |
Circular Saw | 0.125" | Good | Poor |
Electric Shear | 0.090" | Excellent | Fair |
Clean up those cut edges with a deburring tool or file - sharp edges can damage wire insulation and just create a whole mess during assembly. Take a deburring tool and run it along both sides of each cut until the edge feels smooth to your touch.
Metal bending is the key to turning flat panels into three-dimensional enclosure shapes. And let me tell you - it requires some precision to get those square corners and consistent angles right across multiple panels.
A sheet metal brake clamps the material between a straight edge and a bending leaf - it's pretty straightforward. Just make sure to position your scribe line exactly at the brake's edge, or you'll end up with incorrect bend angles and dimension errors.
Before you even mark your panels, calculate the bend allowance. Aluminum stretches during bending, and the neutral axis shifts depending on thickness, bend radius, and a bunch of other factors. For 90-degree bends in 0.040" material with a 0.125" radius, you'll want to subtract approximately 0.030" from your flat pattern dimensions.
That bend allowance formula is pretty standard, but worth remembering: BA = (π/180) × Bend Angle × (Inside Radius + K-factor × Thickness)
For 3003 aluminum, use a K-factor of 0.33 - that accounts for material flow during the bending process. And as for the brake's clamping pressure, just make sure it's set right for the material thickness - too little and the sheet will slip during bending, too much and it'll create marks on the surface finish.
If you're working on a small project, you don't need a brake to form custom sheet metal enclosures. There are a couple of other techniques you can use.
● Vise and wood blocks are great for single bends in thin material. Just clamp the panel between two hardwood blocks positioned exactly on the bend line, and apply some steady pressure with a rubber mallet - working from one end to the other will prevent any localised deformation.
● Plywood jig bending is another option that uses a forming block cut to your desired angle. Clamp the aluminium over the block and press it down gradually - this method is perfect for creating consistent bends across multiple identical panels.
Before you move on to the next one, check each bend with a machinist's square to make sure it's good. Small angle errors will compound quickly in multi-bend enclosures, and you don't want to have to go back and redo any of them.
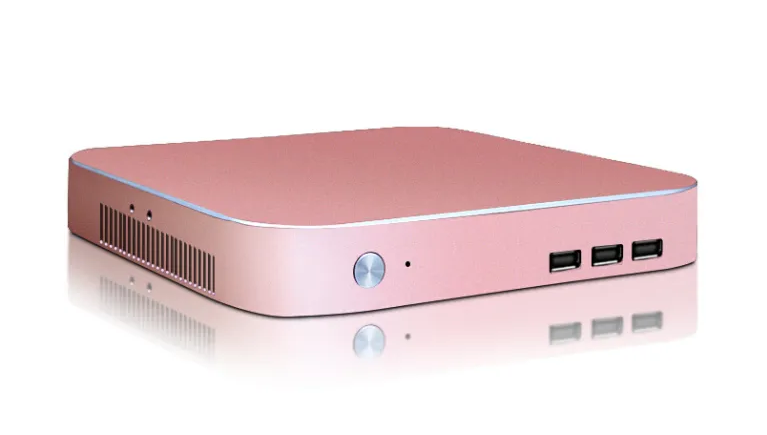
Precise openings for connectors, switches, and displays can make all the difference between a decent build and a professional-looking finish. Plan your hole locations before cutting, and make sure you're not weakening the enclosure structure in the process.
Keep holes at least 1.5 times their diameter away from panel edges - get too close, and you risk cracking during drilling or use. Position multiple holes with a bit of space between them for structural integrity.
Start with a center punch at each marked location - this will prevent the drill bit from wandering and keep the holes where they're supposed to be. A spring-loaded automatic punch is a good tool to have for consistent depth marks.
For holes under 1/4", just drill straight through with a twist bit designed for metal - apply some cutting fluid and run the drill at a moderate speed. Don't go too high with the RPMs or you'll generate heat that gums up the bit and ruins hole quality.
Larger openings are another story - you'll need to use a step drill bit approach. Start with a pilot hole (1/8" diameter), then progressively increase the size until you reach the target dimension - this will prevent the bit from grabbing and produce clean edges.
That's a quick rundown of your hole-making options:
● Twist bits - standard holes up to 1/2", need some deburring afterwards
● Step bits - clean holes from 1/4" to 1-3/8", self-deburring
● Hole saws - large circular openings, leaves rough edges
● Chassis punches - perfect rounds for connectors, expensive but precise
Mark the cutout perimeter with scribe lines - then drill a starter hole in one corner large enough for your jigsaw blade (typically 3/8"). Insert a metal-cutting jigsaw blade and cut along the marked lines - keep the saw's base plate flat against the panel surface, and let the blade do the work without forcing it forward.
File the cutout edges smooth with a flat file - work at 45 degrees to the edge for faster material removal, then finish with strokes parallel to the edge for smoothness. For display windows or ventilation grilles, round the corners with a small rat-tail file - sharp internal corners can concentrate stress and crack under vibration or impact.
How you join panels matters—for strength, obviously, but also for looks. What you pick really comes down to whether you'll need to take this thing apart later and what tools you've got lying around.
Pop rivets make strong joints, and here's the nice part: you don't need access to both sides of the panel. Drill holes that match your rivet diameter (usually 1/8" or 5/32"). Get your panels aligned, clamp them down good and tight. Slide the rivet through both layers, then squeeze the rivet tool handles all the way—the mandrel should snap off clean with the rivet head.
Space your rivets somewhere between 1" and 1.5" along the seams. Tighter spacing means stronger joints, but takes forever. Go too far apart, and you're asking for panel separation when things get stressed. Corner joints need rivets at least 1/4" from the edges, or the material tears. Stagger them on adjacent sides; you're basically creating weak points on purpose.
Self-tapping screws are your friend if you need to disassemble later—modifications, repairs, whatever. Go with #6 or #8 sheet metal screws, pan head,s or flat heads.
Pilot holes should be 0.020" smaller than the screw's minor diameter. This gives the threads something to grab without splitting your thin aluminum.
Fastener spacing guide:
Panel Thickness | Screw Size | Spacing |
0.032" - 0.040" | #6 | 2" - 3" |
0.063" - 0.090" | #8 | 3" - 4" |
Use threadlocker on screws facing vibration. Blue threadlocker lets you take things apart down the road while keeping screws from backing out during operation.
TIG welding gives you the cleanest joints, but it's not exactly beginner-friendly, and you need the right equipment. Best for enclosures needing hermetic sealing or maximum strength. Practice on scrap first—seriously, don't jump straight to your actual panels.
Clean both surfaces with acetone before you start. Aluminum oxidizes instantly, and that oxide layer kills proper weld fusion.
For custom metal enclosures where appearance matters, grind your welds flush and polish them to match the surrounding material. Time-consuming? Sure. But that's what gets you factory-quality results.
Raw aluminum oxidizes naturally and turns a dull gray. If you want to improve both the looks and the durability, you need to apply some sort of surface treatment.
Get rid of all the sharp edges and burrs before you apply any finish. Use a deburring tool to run around every hole, cutout, and panel edge. Sharp spots like that can catch on your clothes, damage cables and make a safety hazard.
Take some progressively finer sandpaper - 220, 400, 600 grit - and rough out any visible surfaces. You can either sand in one direction for a brushed finish or go round in circles for something more uniform.
Pro tip: If you're working on a flat surface, wrap the sandpaper around a small block of wood to stop you from getting low spots or uneven areas from the pressure of your hand.
● Anodizing is an electrochemical process that converts the surface of the aluminum into aluminum oxide. This oxide layer gives you great protection against corrosion and you can dye it all sorts of colors. You can do it at home with a battery charger and some sulfuric acid, but if you want to get it done properly, you're better off taking it to a commercial service.
● Powder coating gives you the most durable finish and it comes in an endless variety of colors. It's electrostatically applied and then baked in an oven. It resists scratches, chemicals and UV light a lot better than liquid paint.
● If you're doing a DIY project, spray paint on metal works okay - it's just not as good as the other two. You need to apply loads of thin coats rather than one thick coat and sand it lightly between coats with 600-grit paper for better adhesion.
Finish Type | Durability | Cost | DIY Feasible |
Anodizing | Excellent | Medium | Difficult |
Powder Coat | Excellent | High | No |
Spray Paint | Good | Low | Yes |
Clear Coat | Fair | Low | Yes |
Before you paint, give the panels a good clean with isopropyl alcohol. Oil from your skin stops the paint from sticking and can cause all sorts of finish problems.
Internal standoffs and mounting points keep your electronics in place and prevent them from moving around when you're handling or shipping the enclosure. Think about where you're going to put those before you start putting the panels together.
Threaded standoffs give you precise spacing between circuit boards and the bottom of the enclosure. They come in different heights and thread sizes (#4-40 and #6-32 are common).
Mark the standoff positions by putting your PCB in the enclosure and marking through the mounting holes. Then remove the board and centre-punch each mark.
Installation steps:
● Drill some holes in the right size for your standoffs
● For press-fit standoffs, the holes need to be 0.005" smaller than the diameter of the standoff
● Screw-in types need tapped holes or PEM nuts
● Just test the fit of one standoff before drilling all the locations
PEM nuts (self-clinching fasteners) create strong threaded mounting points in thin aluminum. You need a special arbor press or C-clamp and the right dies to get them installed, and the knurled body locks into the parent material for good.
Space your standoffs to support all the PCB corners and any heavy components. A board with a big transformer or a heat sink needs some standoffs near the weight to stop the board from flexing.
Standoff placement guidelines:
● One standoff per PCB corner is the minimum\
● Add some supports within 2" of heavy components\
● Don't space standoffs more than 3" apart on big boards\
● Keep standoffs at least 0.25" from the edges of the panel
Wall-mount enclosures pretty much require keyhole slots or threaded inserts on the back panel. Where you position the mounting points is pretty critical: aim to distribute the weight evenly and make sure you're lining up with standard wall stud spacing - 16 inches on center is where it's at.
Mounting An Enclosure to A Wall: The Basics
● Keyhole slots for a quick and easy wall hang\
● Threaded inserts for secure screw mounting\
● Flanges with through-holes for surface mounting\
● Mounting ears for attaching to a bracket
Now, when it comes to setting up a rack mount, get some threaded cage nuts or rivnuts on the front panel edges. Pace them out according to EIA specs (U space = 1.75 inches). Most folks just use these cage nuts.
DIN rail clips are how you attach the bottom of the enclosure to an industrial panel mount. When you set these up, make sure the weight is balanced, and it's easy to get the enclosure on and off the rail.
A Pro Tip: always do a test fit of all that mounting hardware before you fully assemble the thing. Changing things once it's all done can be a real pain - you'll probably have to break it down and you'll likely end up mucking up nice surfaces.
You've now got the whole process for making custom aluminum enclosures, from picking out the right material to getting everything installed and looking nice and professional.
Some Fabrication Points to Keep in Mind:
● Choosing between 3003 and 5052 aluminum alloys based on what you need\
● How to measure and mark without wasting material\
● Cutting panel: different tools, different methods\
● Bending corners: not as hard as it looks, but square corners and consistent angles do take some know-how\
● Making holes and cutouts for your components\
● Assembling the panels: rivets, screws, and welding are all options\
● Surface finishing: how to make your enclosure look good and last a long time\
● Mounting hardware for secure PCB positioning
If you need to make a bunch of enclosures or ones with complicated geometries, you may want to look into custom metal enclosures from manufacturers like Shenzhen Hongfa Shunda Mould Co., Ltd. They can handle everything - from prototypes to big production runs - so you can focus on getting the electronics right.
